Natural Haircare – can you really wash you hair (and clothes) with conkers?

Horse Chestnut Tree
Horse Chestnut Tree

Natural haircare can be fraught with challenges. Where are the ingredients from, how are they sourced, are they sustainable, and will they work? Well, let me tell you a secret – I haven’t used regular shampoo to wash my hair for almost a year now.

Recently, I have been using a soapnut shampoo every 4-6 days, substituting for a wash of chick pea flour (a tablespoon mixed with a little warm water) every few weeks.

But, conscious that the soapnuts grow far away and of concerns expressed about the impact of their rising popularity here on their cost for those who have been using them for centuries, I have been looking for a more sustainable alternative.

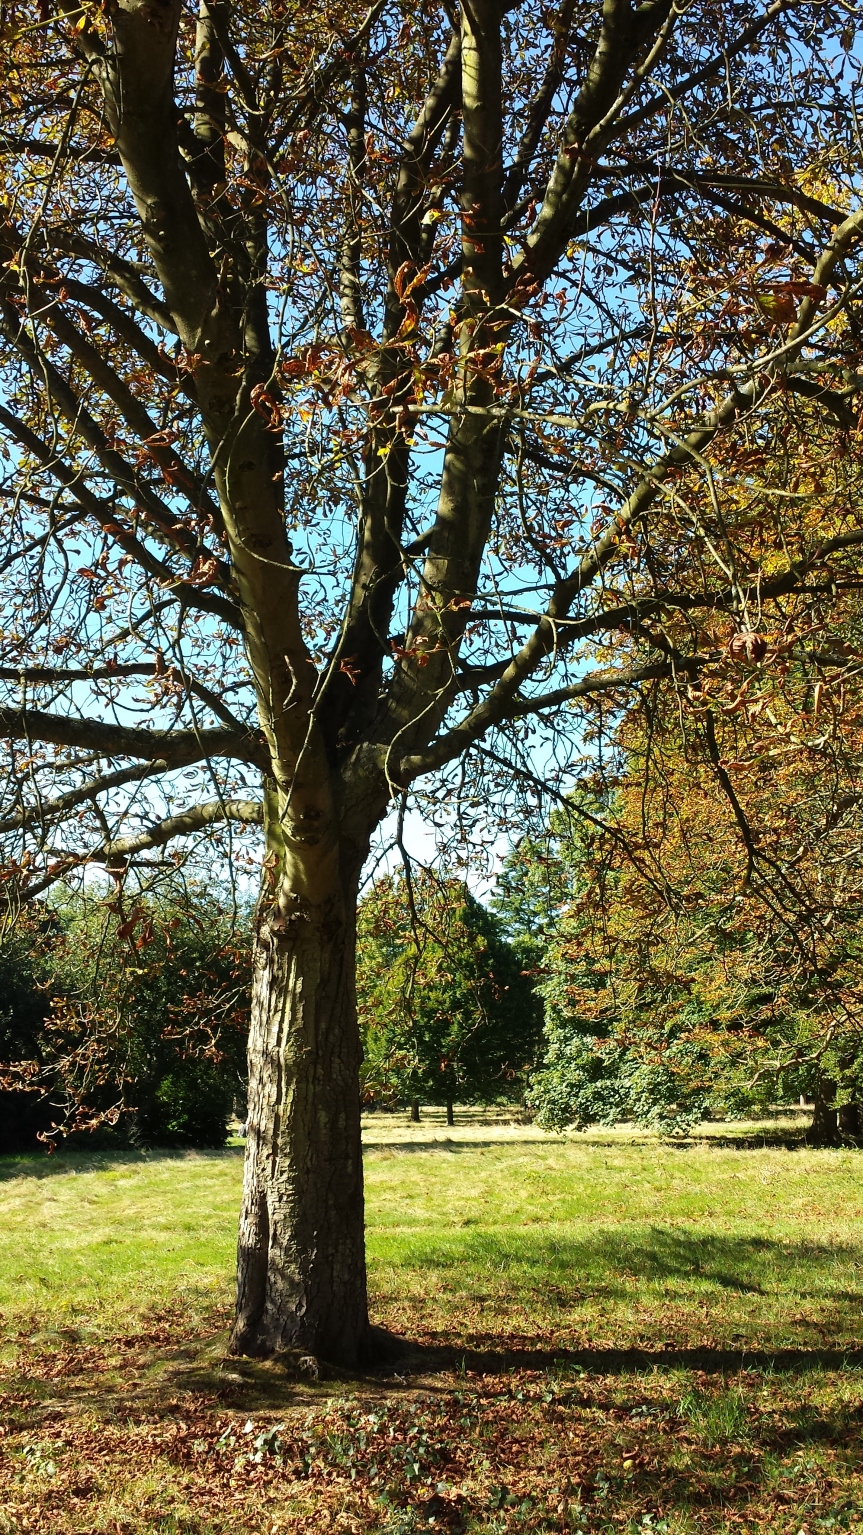
So, when I heard (via the fantastic community that is the Zero Waste Heroes Facebook Group) that conkers are a popular alternative to soapnuts in Germany I was keen to give it try. Something both local and free – now what could be better? Now autumn has arrived, I can finally give it a go.

My first foraging trip was unsuccessful and turned up just a single conker but then I realised a park would, of course, be the best place to look. I found a few on my way to work (quick dash as I realised the park opposite the station was a good place, but that my train was in 10 mins!), but did much better in my lunch hour at the beautiful Cassiobury Park in Watford. My cloth bag was swiftly filled, though as I carried them home at the end of the day I did wish I hadn’t gathered quite so many.

Now how to choose between the variety of recipes online? Although I read a few I decided I wanted to keep it simple. I crushed up about 5 or 6 conkers, but you can experiment with the strength to see what works for you and your water, and soaked them in a cup or so of warm water overnight. Discard any that are split – I had a few and they went mouldy before I got to use them.

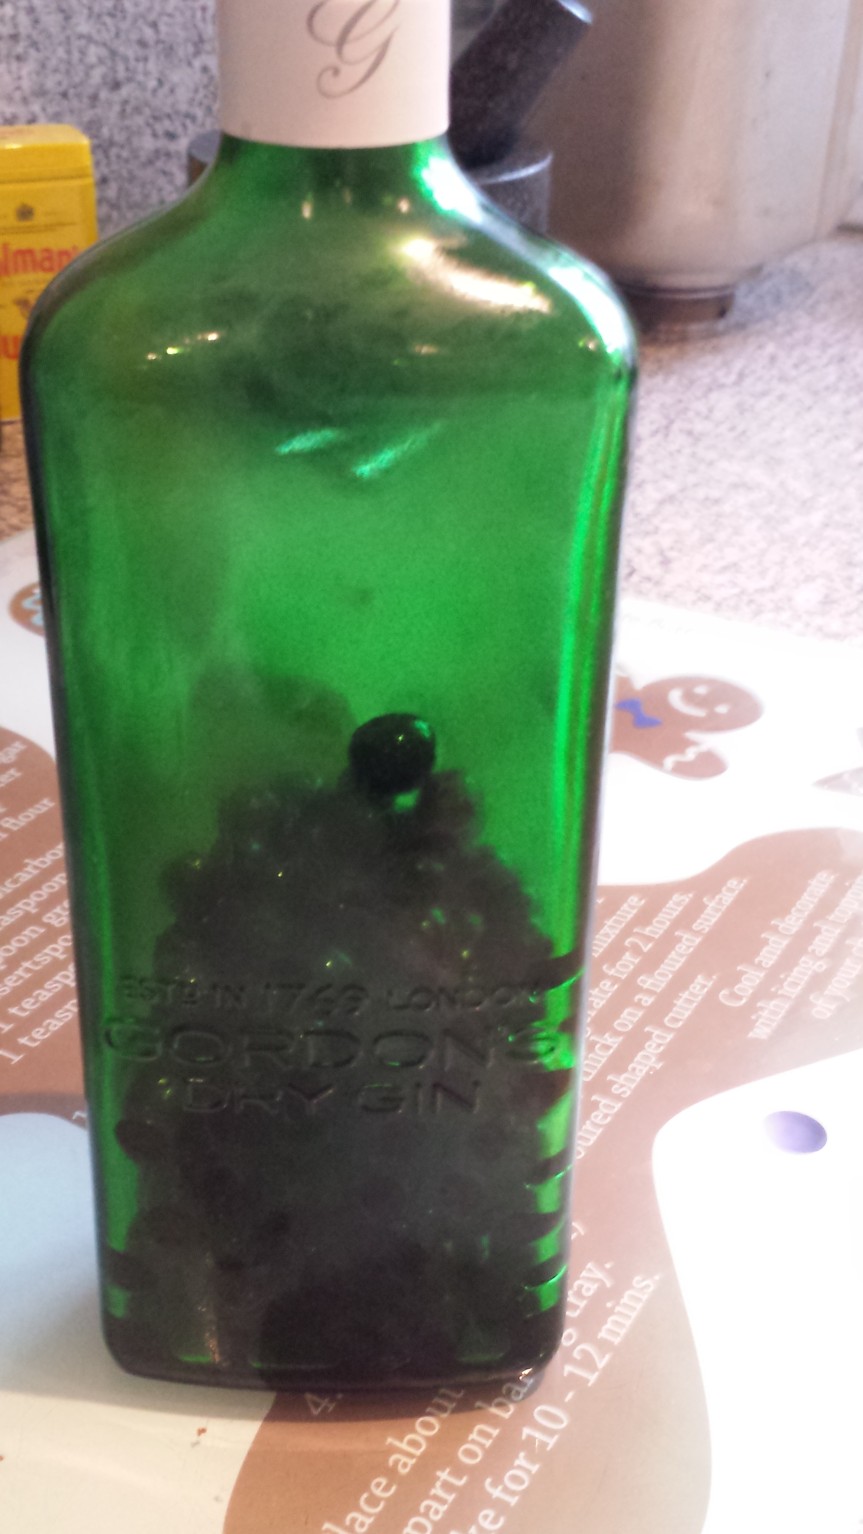
I strained the liquid in the morning (you should get a nice milky looking liquid – that in the photo below has separated out slightly – this was just before I shook and sieved it) and used some of it to wash my hair. Giving it a quick shake revealed the frothiness caused by the natural saponins. I used an empty liquid soap dispenser to apply to my hair, focussing on the roots – an old shampoo bottle would work well too. Take care to avoid getting any in your eyes. The conkers apparently have a slightly lower ph value than the soapnuts. I’m not quite sure (will try to find out and update) whether this means a ph balancing rinse is necessary (not needed with soapnuts) but I did rinse with some leftover coffee with a splash of white vinegar. This also acts as a conditioner. The liquid won’t lather like shampoo and is much less thick, which may seem strange if you are used to shampoo. I wasn’t sure it was working at first and my hair did feel a little waxy while it was wet (a hard water problem) but once dry I am really pleased – it feels lovely and soft, and importantly, clean.

I didn’t need to use all of the liquid on my hair so used the rest to wash a load of laundry. I added a splash of vinegar to the machine as well as we have very hard water. I wasn’t washing anything with stains so can’t yet comment on effectiveness there (I usually need to apply stain remover anyway with soapnuts) but they came out smelling nice and fresh. I am sure you could add a few drops of fragranced oil if you like a scent to your laundry. I’m used to it being unfragranced.

If you have collected enough to see you through the winter you can dry the whole or the chopped up conkers, and then mix with the water as you need to use it. A word of warning – I tried chopping them in a mini food chopper and, it broke (though it’s possible that the plastic bowl cracked during washing up) – so might be better to cut them, grate them or bash with a hammer, or at least not try first time in an expensive food processor. Be sure to label them clearly – remember that raw conkers are poisonous. Might also be worth testing a small amount on your skin in case of allergies.

Don’t forget that you can compost the used conkers.

I will definitely be trying this again, to see if I can replace soapnuts altogether, or at least partially. Do let me know if you give this method, or any of the variations, a go and if it works for you.

You can read more about the other natural hair washing methods I have used in my earlier post about Giving up Shampoo

20161007_190717

A Spring Foraging Adventure with Hedgewitch Kat

Kat starting off our walk with some borage

On a lovely hot and sunny Saturday morning I walked across the water meadows and along the canal to meet Kat and a small group of fellow foragers keen to learn from her experience.

She began by showing us some borage, which she told us is used to flavour Pimms.  This was one I know for adding to a drink- you can freeze the pretty purple blue flowers in ice cubes or just pop into your drink as a garnish.  We all took a taste of the stalk which is slightly cucumbery.  The leaves are slightly furry.

We then took a look at ground elder, growing close to the ground as the name suggests.  As leaves look similar to those of the elder tree it is important to check that the plant is not actually a young elder tree sapling (in which case it would have a more woody stalk and likely be under or close to an existing elder tree), as the tree leaves are not edible.  The young ground elder leaves had a lovely tangy taste.  This plant was brought in by the Romans as it is apparently good for gout.

We then had a look at a young burdock plant – the root is used to flavour dandelion and burdock and can also be used as a vegetable, but remember you should not dig up a plant without the landowner’s permission.  You can also eat the young leaf stems, first stripping off the hard outer peel.

Everybody’s favourite of the day was Garlic Mustard or Jack by the Hedge – there was a plentiful supply of this along the canal and the river and it tastes just as the name suggests.  It’s best to take just the top few leaves from any individual plant  – these can be eaten raw and can also be used to make a great pesto. I later spotted these a little closer to home so will definitely be out for some more of these in the next week.

The leaves of ground ivy, a low growing creeping perennial with small purple/blue flowers can be used to make a herbal tea and were used to flavour beer before the use of hops became widespread.

Nettles are the wild edible most people will be familiar with but I didn’t know that stinging nettles are actually unrelated to the white and purple flowering deadnettles ( which don’t sting) although all are edible. The young shoots and leaves of deadnettles can be added to salads or stir fries.  Stinging nettles are popularly used for soup but can also be used in a variety of other dishes such as risotto, or to make a syrup.  They are very high in iron and a range  of other vitamins. It is best to use young plants in their first year, and remember to bring gloves for picking them.

We also had a look at the hawthorn – a familar sight in British hedgerows.  The leaves can be dried in summer and used to make a tea.  The leaves contain a chemical which helps you to feel full and are known as “bread and cheese”.  The small fruits which appear later in the year are edible but fairly bland ( when I have tried them before I found them to be like a very small floury bland apple).  They can be used to make hawthorn jelly or added to other fruits and dried to make a fruit leather.

Still alongside the canal, we took a look at the large leaved comfrey plant.  The leaves can be boiled and used like spinach but it is also known for its medicinal properties ( for healing bones).  You can also cook the leaves tempura style in a little batter.

As we moved away from the canal and onto the watermeadows Kat showed us the important difference between hemlock (which is extremely poisonous) and cow parsley.

She then showed us broadleaved plantains growing in the meadow grass.  We have a smaller version of these growing in our back garden lawn.  And cleavers/goosegrass/stickyweed which can be gently steamed in a little butter when young (before the seeds appear)

Dandelions are another one everyone will easily recognise.  All parts of the plant are edible apart from the seeds.    I remember spending a whole day collecting the flowers as a child for my dad to make dandelion wine. Another of the foragers told us of a recipe for dandelion marmalade.  The young leaves can be used in salads.

We had a look at some young himalayan balsam plants emerging near the river.  These are an invasisve species so are being removed in many places.  You can help stop them spreading by collecting the seeds in late summer (shaking into a plastic bag as the seed pods explode) .  Adele Nozedar’s book mentioned at the end has recipes for Himalayan Seed Curry and Himalayan Balsam Seed Rissoles .  You can also just eat the seeds as they are, and can also eat the leaves and stems.  The stems are apparently a little like rhubarb although as we always have a surfeit of actual rhubarb in the garden I have never felt the need to try.

Kat also showed us tansy which is antibacterial ( and tasted so) and common hogweed.  The young unfurled leaves and flower heads  of the common hogweed can be cooked gently like asparagus. This plant should not be eaten raw. It is important to be sure you have correctly identified common hogweed as the larger giant hogweed is poisonous.

We finished up our walk with a taste from a large thistle – Kat cut and trimmed pieces of the stalk for us to sample.  And it was surprisingly tasty – I would say a little like celery.

We then made our way back to the pub for a quiz on what we had learnt that morning – with the prize of a lovely pot of jack-by the hedge pesto made by Kat – which I am looking forward to using this week .

This walk really helped me, giving me the confidence to try some plants I knew were edible but was not so confident about identifying and also showing me some I was unfamiliar with.  A top tip for me was the fact that pesticides cannot be sprayed close to waterways which makes the river and canal edges a great place for foraging ( although as they are also popular places for dog walkers, try to avoid the spots dogs are likely to wee or be sure to well wash/cook  your finds).

20160510_122410

Disclaimer and additional references:

This is a brief overview so please do not rely on my images for identification purposes, or rely on this information for the appropriate use of each plant – be sure to check with someone who knows or if using books and online images use several sources to be sure you have a clear image of any unfamiliar plants and sufficient information on which parts of the plant are edible and how to prepare them.  If in doubt don’t eat it.

Information from Kat’s fascinating walk has been supplemented, and my memory refreshed as necessary, by reference to  Richard Mabey’s Food for Free.  Other useful foraging reference books are Alys Fowler’s the Thrifty Forager and Adele Nozedar’s The Hedgerow Handbook – recipes, remedies and rituals.

A link to Kat’s blog is below.  Eat the weeds is also a useful reference site for more information on individual plants

Kat’s blog: Hedgewitch Adventures

Hedgewitch Adventures Facebook Group

Eat the Weeds

If you enjoyed this post please let me know by commenting below – you can also follow me on  Twitter or Facebook


Three Cornered/Few Flowered Garlic

It is definitely wild garlic season in the UK but so far I haven’t found where it grows in the wild locally to me so have been looking at the various garlic pesto recipes popping up on blogs with a deal of envy.

However, walking to a friend’s house for a shared Pilates class this morning I caught a glimpse of white flowers along the footpath behind her house, which runs through a slightly wooded area.

It wasn’t the true wild garlic or ransoms (allium ursinum) I had been looking for but instead was the milder three cornered garlic ( allium triquetrum), and similar few flowered leek ( slightly different flower shape) , growing along with some bluebells.

Three Cornered Garlic, Allium Triquetrum

This is equally edible but has a milder, sweeter flavour meaning that you can use the leaves raw in salads as well as in cooking. You can also eat the flowers.

You can recognise it by the triangular leaves. The white bell shaped flowers have a small green stripe down each petal. As another check, smell the leaves to be sure they smell of garlic.

I wasn’t really prepared for this bit of ad-hoc foraging so only had a cloth bag and was wearing particularly unsuitable white trainers, especially as it was raining, but went back to collect a small amount after the class. Not enough to make pesto I fear as I was trying reach far into the verge to avoid the ones dogs were most likely to have weed on whilst also trying to avoid picking the bluebell leaves which look fairly similar ( but were much larger), and avoid getting too wet and muddy. But now I know where to go when better equipped. My friends also gave me some tips on where I might find ransoms in the area.

Three cornered garlic, and bluebells

I also came back with a delicious homemade courgette and pine nut cake my friend had baked with a glut of courgettes from her veggie box – will definitely be getting the recipe for that.

I am not going to repeat a recipe for garlic pesto as I have seen several on other blogs recently, most recently this one from Gypsy Soul who also features a monthly Thrifty Thursday blog link up which I have joined a couple of times.

I think the quantity I collected will be ideal for adding to a risotto.

What’s your favourite way of using wild garlic, whichever variety?

You can now follow me on Twitter or Facebook using the links at the top of the page. I have a board on foraging on Pinterest

Finished your sloe gin? Don’t throw away the fruit.

Ever made sloe gin?  What do you do with the sloes once they have imparted their lovely flavour?

Back before Christmas we found a great new place to forage for these tasty fruit and so made lots and lots of sloe gin ( see recipe here) .  We have now finished off a few bottles and have enjoyed the sloes with vanilla ice cream  on several occasions (do remember to watch out for the stones – they are pretty hard even after several months in alcohol).  So, about time to try something new with them – flavouring wine.

What you need:

Remaining sloes from 1 bottle of sloe gin

1 bottle red wine – suggest a screw top just to make life easy.

and that’s about it.  Easy peasy.

20160321_161432

Start by pouring yourself a glass of wine – large enough to make space in the wine bottle to add the sloes.  You can drink this now  – I always find it helps!

Carefully transfer the sloes from your gin bottle into the wine bottle. I found this easiest to do by pouring them into a bowl and then transferring with clean hands.

Then simply pop the screw top back on and leave the flavours to infuse for a month.

It’s a good idea to stick a label onto the bottle to identify it, and to mark on the date when it will be ready to drink – as once the sloes are in it looks like any other unopened bottle of red wine.

20160321_161608

Has anyone tried anything similar?  Any other ideas for using the sloes?

If you enjoyed this post, please let me know.  You can now follow  me on  Twitter and Facebook

Sloe gin

A fortunate side effect of a sponsored walk for my son’s football club yesterday was the discovery of a fantastic place for foraging sloes, blackberries, hawthorn berries and rosehips. Definitely one to remember. Not having the time to stop then we headed back this morning equipped with plenty of empty ice cream tubs for collecting in – after 15 mins we had about 1.5kg of sloes.

Sloes on blackthorn tree
Blackthorn tree laden with sloes

Sloes are the fruit of the blackthorn tree and are related to bullace, damsons and plums.  Sloes are the smallest and tartest of these fruits.  The blackthorn is a widespread native hedgerow shrub that you may spot whilst out on a country walk.  They have large spiky thorns which help distinguish them fron anything simliar so it is a good idea to wear gloves when picking them.

Sloe gin is the most popular use of these small tart fruit, although you can also use them in jam and in desserts.

The quantities below are approximate – you can vary to taste:

500g sloes – wash them and remove any remaining stalks and leaves.  Unless you are picking after there has been frost ( lucky you if you can still find them then) pop them into the freezer for a day or two before using  ( although they will be fine left longer if you don’t have time to make the gin then). Defrost before use.

350g sugar ( either granulated or caster)

70g bottle of gin

The easiest way is to split the fruit, sugar and gin between 2 empty 70cl bottles.  It is a good idea to sterilise these first if they have been stored for a while – wash in hot soapy water and dry in a 140 degree C oven for 10 mins.  Allow to cool before using. I usually soak the lids in boiling water during this time.

Once you have added all the ingredients pop on the lids and give them a careful shake.  Store somewhere dark for about 3 months, shaking them occasionally to ensure all the sugar is dissolved.  After this time you can either remove the sloes and decant into a single bottle or just leave them in, which looks nice.

Once you have either decanted or drunk the gin the gin soaked sloes are delicious served with vanilla ice cream ( watch out for the stones) or can be used with fresh sloes in jam.  Alternatively you can add to a bottle of red or white wine and leave for a month to make a fortified wine.

Rosehip tea

I love rosehip tea and have been buying it from the supermarket for years.  When I was pregnant, it was pretty much all I drank.  But, one by one, the supermarkets have stopped stocking it and I don’t much like the brand generally stocked by health food shops (too much hibiscus), so thought it was time to try making my own.

I found a recipe at www.eatweeds.co.uk . 

No rosehips in my garden sadly so could I remember where I had seen some I could forage?  I set out for a walk, with walking boots and a bag containing several containers, gardening gloves and secateurs.  Spotted loads of lovely looking ones, all in  people’s gardens!

Eventually I remembered somewhere I had seen a single bush so headed there.  Got a few strange looks as I cut the rosehips off with my secateurs but never mind.  Found another larger bush a little further along.

Thought I’d start small this year to see how it works, and keep track of more places for roseship locations for next year.

I started by giving the rosehips a wash and then trimming them.

Image of roeships in washing up bowl
Rosehips getting a first rinse – I seemed to have brought along a few spiders too.
Prepared rosehips
Prepared rosehips

Then I popped them into my electric dehydrator – well spaced out. eatweeds reckons about 6 hours.  Mine must have been large hips because I reckon they took 12-15, spread over a couple of days.

Rosehips in the dehydrator
In the dehydrator

This is what they looked like when dry:

Image

Then I whizzed them up.  As I’d read some hips are very hard and wasn’t really sure what type these were, I used a small coffee grinder which used to belong to my grandparents.  It worked a treat, in small batches, which also allowed me to experiment with how small to make them for sieving the hairs out.

Image

Images below show the sieved rosehip pieces and the hairs which were sieved out.  I felt itchy for the next hour!

ImageImageImage

Anyway, there you have it, dried rosehips for making tea.  Washing and trimming was the most fiddly bit but really the whole process was quite simple so will be making a bigger batch next year.

To make the tea you will need to infuse a spoonful or two in hot water and then sieve. It won’t look as red as the purchased sort, but just made my first cup and it tastes pretty good.

My walk also produced a 4th batch of damsons.  I’ve got some damson gin and vodka both on the go at the moment so for the moment have bunged these in the freezer to use later, when I can see which turns out best.

Hedgerow Harvest, Damson Gin, Plum Vodka and Prunes

The trees and hedgerows are certainly laden with a bumper crop this year.  I remember last year having to reach high into the trees for a few damsons, but this year there are so many.  Whether they are fully ripe yet I’m not sure, but I’m just too impatient to wait any longer and panicked about someone else beating me to it and stripping the trees bare.  Little hope of that this year I think.  Anyway, I left them in the kitchen for a couple of days in the hope they would ripen as swiftly as the huge amount of plums we gathered last week did.IMG_20130906_175944

Last year I made damson gin and also a lovely damson, cardamon and vanilla jam recipe from Alys Fowler’s book. Opened the last jar for my toast this morning to help me decide what to do with this year’s damsons, but realistically there is only so much jam one person can eat (rest of family not keen) so will save that one for next year.  Husband prefers the alcohol!

There are also some lovely apple trees by the brook near to our house, but sadly, the remaining sweet apples are hanging way out of reach across the water, those on the bankside having long gone.

Anyway, after a couple of days I have popped the damsons in the freezer ready to make some damson gin.

This morning I gathered another 8-10kg of plums from the allotment so have spent the afternoon sorting them into varying degrees of ripeness, popping some into the dehydrator, some into some vodka, and leaving the rest to ripen.

Damson Gin Recipe:

450g damsons

200g sugar

70cl gin

Wash the damsons and either prick the skin or each or pop them into the freezer for a couple of days before using.  This will help break the skins for the juices to mingle better.

Sterilise a large jar (see previous blackberry vodka recipe for instructions on how to do this).

Add the damsons, sugar and vodka. Close the lid and give it all a shake to mix the sugar.

Come back to give it a shake every day or so to help it all mix together.

It should be ready to drink after about 3 months.  You can leave the damsons in or sieve out if you prefer, but best not to leave them in for more than 6 months.

Plum Vodka

You can of course do pretty much the same with plums – in either gin or vodka.  This is what I did:

Wash approx 500g plums and half to remove stones (you can probably leave them whole but ours were large plums and I wanted to check they were all maggot free).

Preparing to make plum vodka

Mix with 200g sugar and 70cl vodka in a sterilsed jar.  Shake every day or so to mix as with the damson gin recipe above.  Strain the plums out after 2-3 months and store the vodka in a sterilised bottle.  You can of course then eat the plums too.

This is the 1st year we’ve tried this one so fingers crossed it’s a good one.

Plums and vodka before shaking
After initial mixing

Prunes 

I posted about making prunes last week so this is just an update on how they came out.  Most of the instructions I could find said they would take anything between 12 and 36 hours.  I think ours were almost certainly at the upper end of that – they seemed to take all week.  The end resultIMG_20130906_175507 is pictured.  They ended up a little on the hard side as I went off to work leaving my husband babysitting.  When I came home he had not remembered to give our son a bath or even to give him dinner, but for some reason thought to turn the dehydrator on for another 6 hours!

Anyway, I have this time quartered the plums in the home they will be ready a little quicker as I’m at work more this week so can’t keep an eye on them readily.

I also picked a few more blackberries today so have tried bottling for the first time.  Little nervous about all the comments on the web about botulism if you don’t do this properly so started with a very small amount, to see if it works, and if it’s worthwhile.

Bumper crop of fruit sadly not matched by our allotment vegetables – we have already run out of garlic, having pulled that, and the onions, up too late so that they had started to go rotten in the ground.  So many weeds I can hardly spot the beetroot, carrot and parsnips that are still in the ground.   On the plus side, the leeks are all doing pretty well in their raised bed, where they are relatively weed free.

Blackberry vodka

So, here comes the time of year for the “foraging” part, although I’m not sure picking blackberries overspilling onto the allotment from the adjoining railway line really counts as proper foraging.

Anyhow, last year, we tried out blackberry vodka, raspberry vodka, damson gin, sloe gin, and earlier this year, elderflower gin.  Have to say the latter was pretty disgusting but not sure I got the recipe quite right.  Of all the above, the blackberry vodka and sloe gin were definitely the ones to make again.

Flavouring vodka this way is really simple.  All you need is a bottle of vodka, blackberries, sugar and something to mix them in.

Per litre of vodka use approx 500g of washed blackberries (when picking this equates nicely to a 450g ice cream container) and 200g of  caster sugar.

If you have a spare vodka bottle you could split the vodka between 2 bottles, and add half the blackberries and sugar  to each.  Alternatively sterilize a larger container such as a  1.5 litre Kilner or Le Parfait Jar and pour in the vodka, followed by the blackberries and sugar.

ImageEnsure your bottles or jar are tightly closed and then shake to dissolve the sugar.  This may take a little while and it’s a good idea to come back to the jar and give it a shake every day for a couple of weeks to make sure it’s all nicely mixed.

After 6-8 weeks you can strain out the blackberries and bottle the vodka.  You can then eat the blackberries with ice cream, or perhaps use them with some more blackberries in jam.

Sterilizing the jar:

There are a number of ways to do this:

You can either use the jar fresh from a hot dishwasher.

You can wash in hot soapy water and then dry on a 140 degree C oven for about 10 mins. (Take care removing it and allow to cool a little before trying to fit the seal.)

You can sterilize with sterilising powder from a brewing shop. according to the instructions on the packet,

The rubber seal should be scalded in boiling water.